- Select your event and go to Onsite Hub > Kiosk from the left side menu.
- Click Create in the upper-right corner to create a kiosk.
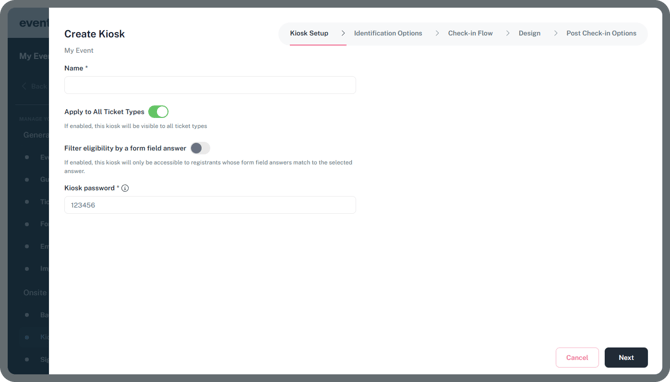
Name
Give your kiosk a name, especially needed if you want to create multiple kiosk experiences for your event.
Apply to All Ticket Types
When enabled, this Kiosk will be visible for all ticket types, which means all attendees can check-in using this kiosk setup.
If this toggle is disabled, you’ll need to manually select which ticket types can use this kiosk setup.
Note: Before selecting a ticket type, make sure you have created at least one ticket type. You can find it under the General menu > Ticket Type to create your first ticket type if it doesn’t exist yet.
Click here to learn more about Ticket Types
Filter Eligibility by Form Field Answer
When enabled, this kiosk will only be accessible to registrants whose form field answers match the selected response which lets you create specialized check-in lines.
Note: Once this option is enabled, additional settings will appear for you to select a form.
If you haven’t created a form field yet, click here to learn more about Form Fields.
Kiosk Password; this is reqiured for data security to ensure that unauthorized people cannot exit the Kiosk mode and go back to the attendee list on the app. Only authorized kiosk operating staff should know this password to switch to admin mode if needed.
- Click Next to proceed on the Identifications Options.
- Identification Options page allows you to set identification methods for attendees using this kiosk setup. These switches control whether to show or hide the corresponding option on the kiosk screen.
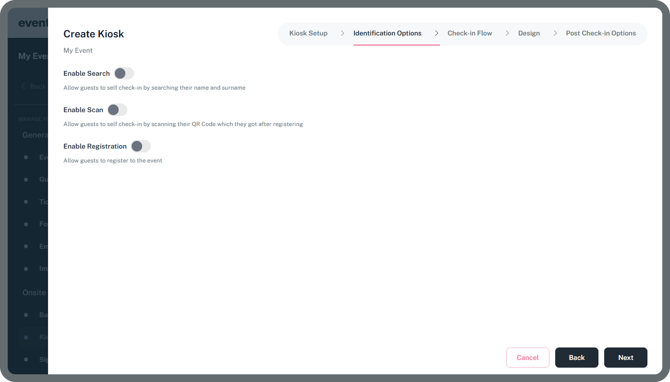
Enable Search
When enabled, guests can self check-in by searching for their first, last name or email.
Enable Scan
When enabled, guests can self check-in by scanning the QR code they received after registering.
Enable Registration
When enabled, guests who are nor pre-registered to the event can register to the event directly from the kiosk screen.
- Click Next to proceed on the Check-in Flows.
- Check-in Flows page allows you to add additional useful steps to your check-in flow. If none of the options are toggled on, the attendee badge will be printed immediately after the attendee is identified, without any further action required.
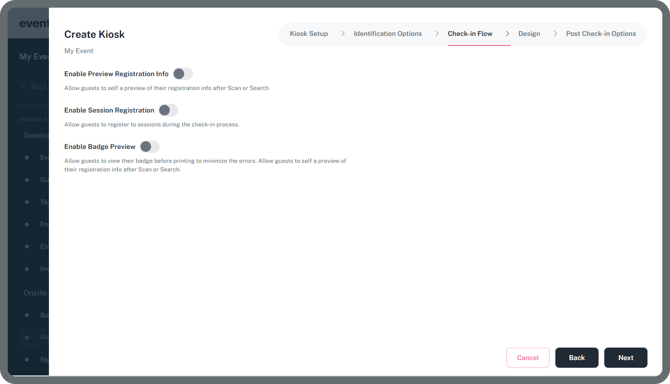
Enable Preview Registration Info
When enabled, guests will be shown a preview of their registration information as a step after identification. In this step you can also enable to edit form fields before printing their badge.
Enable Session Registration
When enabled, guests can register for sessions during the check-in process on this kiosk.
Enable Badge Preview
When enabled, guests can view their badge before printing to minimize errors and ensure accuracy.
- Click Next to design your kiosk interface.
- You can freely and easily design your kiosk however you like.
- Simply select an option from the left-hand panel and choose the component you want to add to your kiosk.
IMPORTANT: Do not forget to design your Final Page. Use the toggle on the bottom right corner of the design area to switch between Homepage and Final Page. Homepage will be the visible page of an active kiosk and the Final page is the page that is displayed after check-in process is done.
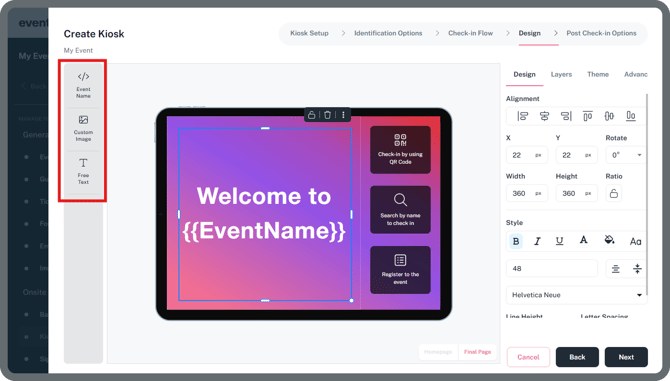
Components
Event Name
Allows you to add the name of your event on the kiosk.
Custom Image
Allows you to upload and place any custom image on your kiosk. You can add a single image to cover the editable area or single/multiple different logos as well.
Free Text
Allows you to add any custom text to your kiosk.
Note: Select the component you want to edit. Once selected, you can customize it using the settings panel on the right side of the screen.
Component Settings
Design Tab
Edit the component’s design, including its style, size, alignment, and overall appearance.
Layer Tab
Manage the order and visibility of your components. You can show, hide, or lock components as needed.
Theme Tab
Allows you to choose any of our pre-set background options you want for your kiosk.
With the Enterprise Package, you can add your own custom kiosk background. Contact Eventpack Support to get started.
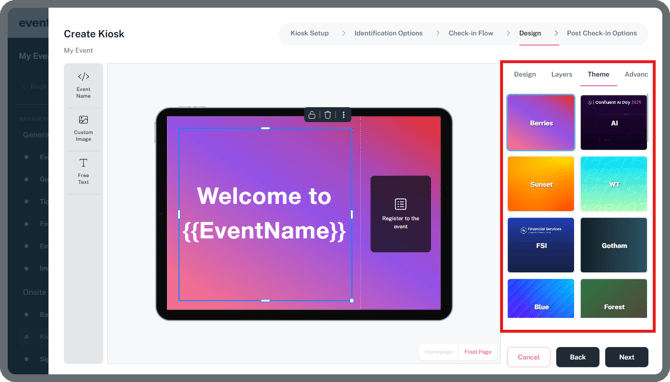
Advanced Tab
Allows you to rotate the tablet display to portrait mode in your design.
- Click Next to proceed on the Post Check-in Options.
- Post Check-in Options page allows you to customize what registrants can see and edit when they attempt to check-in after already being checked-in to the event. For each option, you can set it to Hidden, Available, or Password Protected.
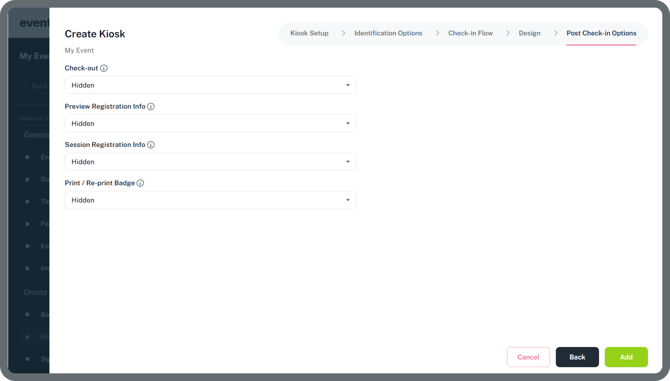
Check-out
Allows guests to check-out if they have already checked-in.
Preview Registration Info
Allows guests to view their registration details after checking-in.
Session Registration
Allows guests to view their session registrations or register to sessions after checking-in.
Print / Re-print Badge
Allows guests to print or reprint their badges. This is typically used in Password Protected mode to ensure attendees cannot print badge copies without staff assistance.