Step 1: Accessing the Exhibitor Portal
- Click the link provided in this email to open the Exhibitor Portal.
- Enter your email address on the login page.
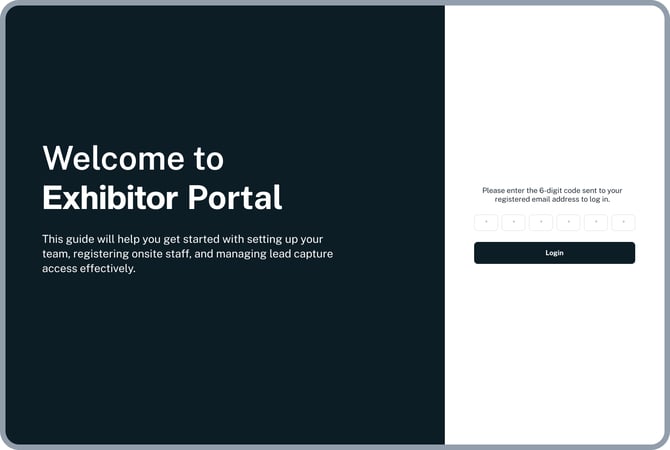
- You’ll receive a 6-digit one-time password (OTP) in your email.
- Enter the OTP to log in.
2. Invite your Team
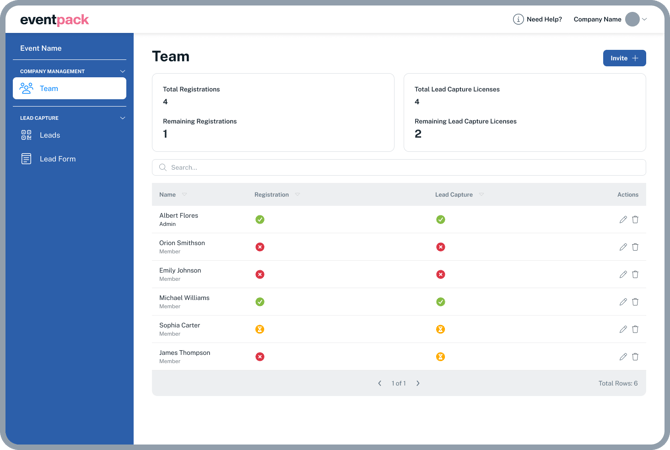
After logging in, you will land on the Team page. Here’s what you can do:
-
Manage your team: Add, edit, or remove team members.
-
View your balances: At the top of the page, you’ll see:
-
The number of lead capture licenses available.
-
The number of registrations remaining for onsite team members.
-
These numbers are set by the event organizer. Lead capture licenses and registration quotas may need to be purchased directly from the event organizer if you need more.
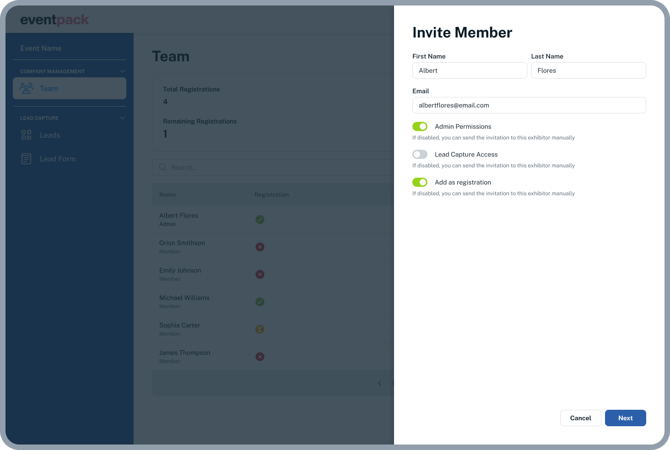
Adding Team Members
To add a new team member:
-
Click the “Invite” button (top right corner).
-
Fill in the member’s details.
-
Choose the permissions you’d like to give them:
-
a. Admin Permissions
-
Can add/edit lead forms (see Section 4).
-
Can manage team members.
-
Can export captured leads.
- Can create custom qualifiers for the Lead Retrieval app.
-
-
b. Lead Capture Access
-
Grants access to the Lead Capture App, where members can:
-
Scan attendee badges.
-
Take notes on leads.
-
View captured leads directly in the app.
- Allows to create custom leads manually.
-
-
Reminder: You have a limited number of licenses. Adding too many people may require purchasing additional licenses.
-
-
c. Registration
- This step is basically the event registration process for your booth staff.
-
Use this option only if the member will attend the event onsite.
-
You will be asked to complete a registration form for this person.
3. Editing or Removing Members

-
Edit a member: Click the pencil icon next to their name to update their permissions.
-
Remove a member: Click the bin icon to delete them.
Important:
If a member has already scanned leads or checked in at the event, licenses or registrations will not be refunded when you remove them.
Members with only Lead Capture Access (no registration) will not be able to scan leads onsite, but they can view captured leads from the portal.
4. Lead Forms
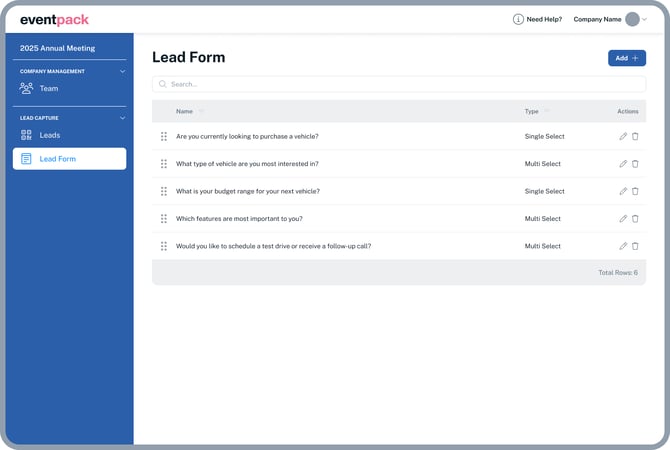
Lead Forms allow you to create custom qualifier questions for your team to use when speaking with attendees. These appear in the Lead Capture App after scanning a badge.
There are three types of questions you can create:
-
Text Field – For open-ended responses.
-
Single Select – Choose one answer from a dropdown list.
-
Multi-Select – Choose multiple answers.
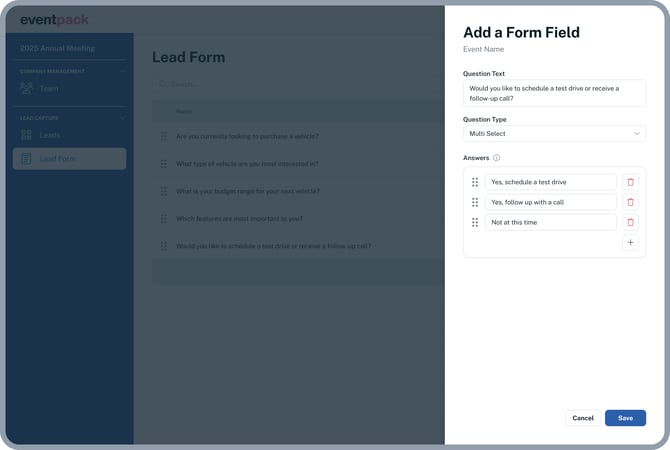
To add answers to Single or Multi-Select questions:
-
Click the “+” button at the bottom right corner of the answer box.
5. Leads List
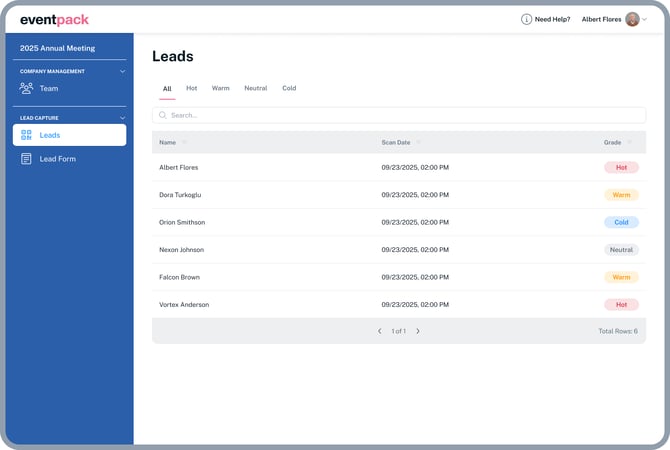
The Leads List displays all leads captured by your team in real-time (if the scanning device(s) is online.
-
View details like capture time and lead grading.
-
Admin users will see an Export button in the top right corner.
-
Clicking this will send a CSV file with all captured lead data to the admin’s email.
-
Use this file for follow-up and next steps with your leads.
-