- Select your event and from the left side menu go to Onsite Hub > Badges.
- Click Create in the upper-right corner to create a badge.
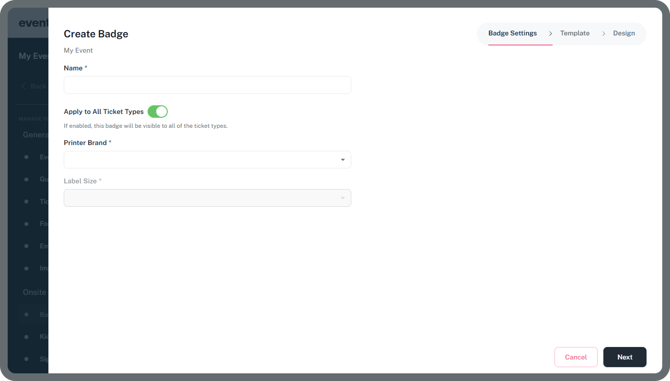
Name
Give your badge template a name, useful especially if you have multiple badge templates for different ticket types.
Apply to All Ticket Types
When enabled, this badge will be visible on all ticket types.
If this feature is not enabled, you’ll need to manually select which ticket types the badge applies to.
Note: Before creating a Bagde, make sure you have created your ticket types. You can find it under the General menu > Ticket Type to create your first ticket type if it doesn’t exist yet.
Click here to learn more about Ticket Types
Printer Brand
Select your preferred printer brand. The Eventpack Onsite Admin app is directly integrated with different badge printer brands > Zebra, Brother, Epson. Custom is useful to connect with plastic card printers via the Print Gateway app.
Note: Depending on the printer brand you selected, additional settings for label size may become available for you to configure.
- Click Next to design your badge.
- You can freely and easily design your badge however you like.
- Simply select an option from the left-hand panel and choose the components you want to add to your badge.
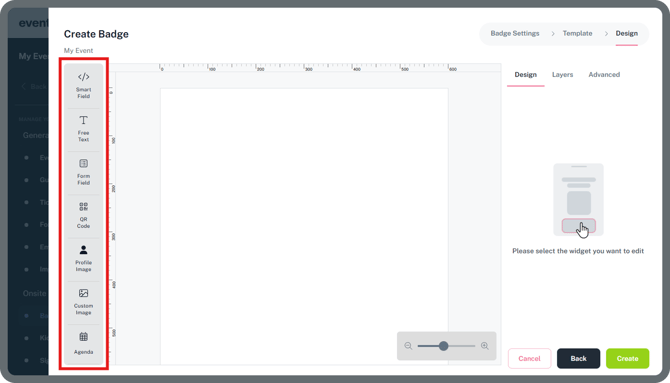
Components
Smart Field
These are the default form fields on the Eventpack platform.
Free Text
Allows you to add any custom text to the badge (like WIFI code etc.).
Form Field
Allows you to add the custom form field answers created by the organizer onto the badge.
QR Code
Enables you to add the attendee QR code to the badge. Needed if Session scanning or Lead Retrieval functionality is used in the event.
Profile Image
Lets you add a profile photo to the badge. Profile photos need to be present in the profiles before printing the badges. Attendees can upload their profile photos either from the Attendee Portal or Event App (profile section).
Custom Image
Allows you to upload and place any custom image (logo etc) on the badge.
Reminder: Some printers may only support black-and-white printing (Zebra, Brother).
Agenda
Lets you add attendees session schedule on the badge. Attendees need to be pre registered to the sessions before printing the badges. This can be done either from the Event app or during the event registration from the event registration page.
Note: Select the component you want to edit. Once selected, you can customize it using the settings panel on the right side of the screen.
Component Settings
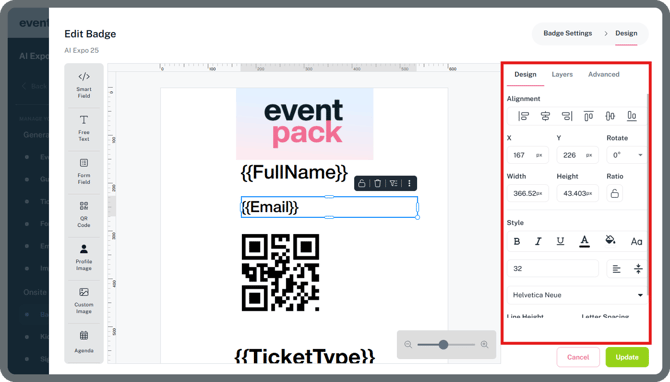
Design Tab
Edit the component's design, including its style, size, alignment, and overall appearance.
When editing a text component’s font size, you can select the Auto option to automatically adjust the text size to fit within the box.
Layers Tab
Manage the order and visibility of your components. You can show, hide, or lock components as needed. You can also upload a pre-printed badge background to help align elements. This background is for design purposes only and will not be printed.
Advanced Tab
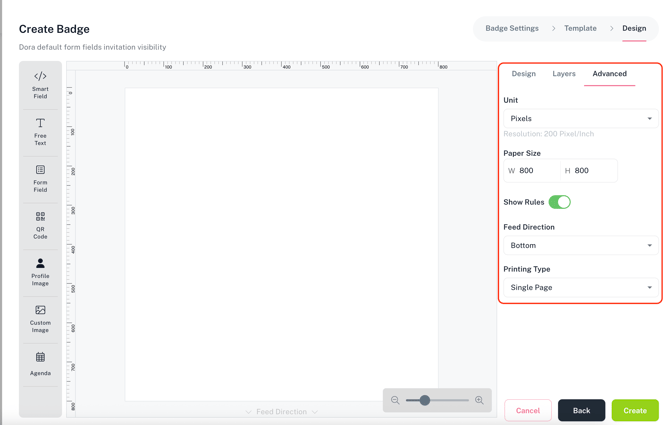
Adjust your badge's unit of measurement, paper size, feed direction, and printing type.
- Unit let's you to switch the size units of the badge designer from pixels to inches and vice versa.
- Paper size let's you to amend the size of your badge paper if needed.
- Show Ruler displays or hides the ruler from the badge designer.
- Feed direction let's you to change the feed direction of the badge paper to the printer. Not recommended to change unless it's really needed.
-
Printing Type; if you have a double sided badge paper and would like to print the exact same information on both sides you can easily do it by selecting "Mirrored Page" from the Printing type dropdown.